
Quick answer: Clay soil is extremely dense, so the easiest way to drill holes in it is by using a heavy-duty drill auger and a high-torque drill. Wetting the soil slightly and drilling slowly helps prevent stalls and broken tools.
Clay soil can be brutal on shovels, trowels, and the person using them. When it’s dry, it can feel like concrete. When it’s wet, it can turn sticky and clog the flights of your auger. This is where an auger comes into play. Augers slice the soil rather than chop at it like a shovel or spade does. Either way, clay is the #1 reason people avoid planting, while others worry about their auger binding, wrist-twisting kickback, overheated drills, and “my auger won’t go any deeper” frustration.
This guide is the practical, step-by-step method we recommend to drill cleaner holes in clay soil without damaging your drill—including clutch setup, safe technique, and how to choose the right clay-soil auger setup only when you truly need to upgrade.
Quick answer: the clay-soil drilling method that prevents binding
If you only read one section, read this:
- Pick the right moisture window: avoid drilling when the soil is very wet (high compaction risk) or bone-dry (maximum resistance).
- Use control, not force: keep the auger vertical, go slow, and let the tool do the work.
- Pulse + clear: drill several inches, then lift out to clear sticky clay from the flights keeping the drill and auger spinning to bring the material up and out of the hole as you lift.
- Use a drill clutch and side handle: Always set the drill’s clutch. It is to a drill what a seat belt is to a car. Set it and you are safe from binding and kickback.
- Match drill power to the auger and soil: clay often requires more power than the same auger in loose soil.
Start with clay-ready tools here: Clay & compacted soil augers and confirm drill power here: Auger drill power requirements.
Why clay soil is hard on drills
Clay soil creates a perfect storm of resistance and stickiness:
- High friction when dry: the auger can “refuse” to cut, which encourages people to push down harder.
- Stickiness when wet: clay can pack into the auger flights, reducing cutting and increasing load.
- Compaction risk: drilling at the wrong moisture can compact the hole walls, making the hole harder to drill and less helpful for roots. The same is true of using a shovel or spade when you lean back on the shovel to pry it compacts the side walls of your hole.
The goal is to drill at the best moisture window and use the technique that keeps the auger cutting rather than corkscrewing into a stuck mess.
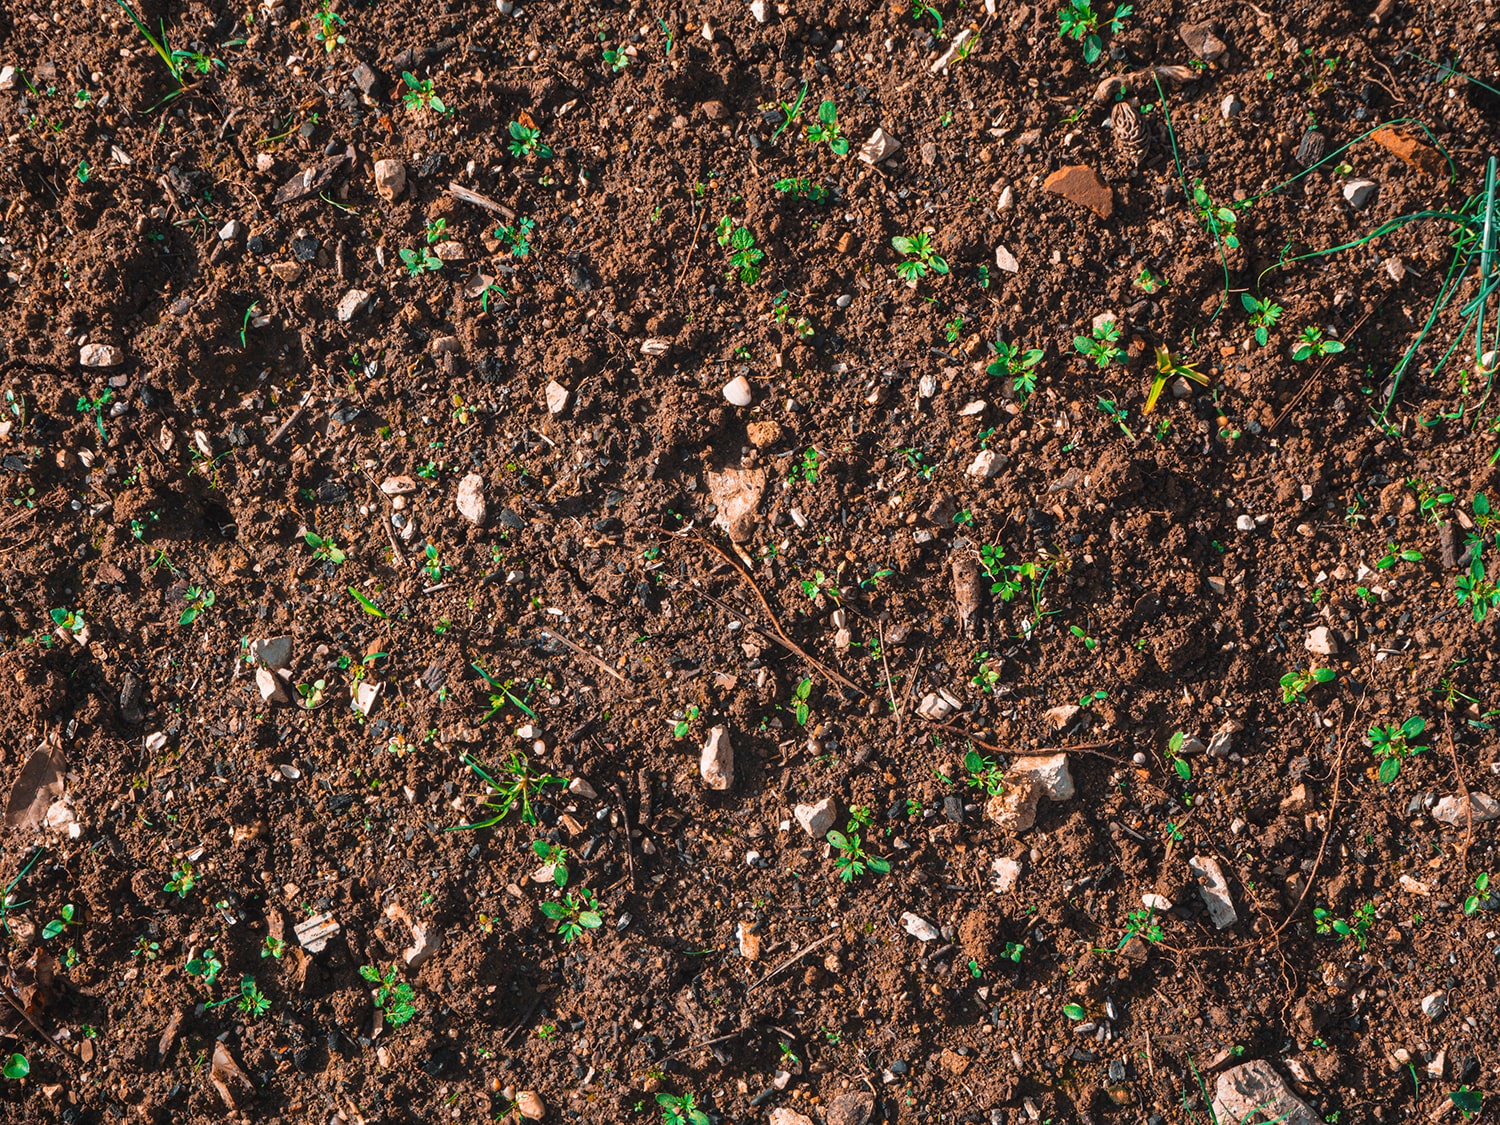
Choose the right day: clay moisture, compaction, and the “ball test”
In clay soil, timing matters. If the ground is saturated, you can compact the soil structure and make future digging worse. If it’s bone dry, you often need significantly more torque.
A practical test: grab a handful of soil and squeeze it. If it holds its shape as a ball and feels very wet/sticky, consider waiting for slightly drier conditions. If it crumbles immediately into dust, consider lightly pre-wetting the area and waiting for moisture to soak in (you want “workable,” not muddy).
Tip: “Workable” clay typically drills best after a modest rain followed by drying time, or after controlled pre-wetting that soaks in below the surface.
Safety first: utilities, kickback, and secure setup
Before drilling, treat this like a real digging project—not a casual garden task.
- Call 811 before you dig. This includes projects like planting trees/shrubs or installing fences and mailboxes.
- Wear eye protection and sturdy footwear. Avoid loose clothing.
- Use a stable stance and be prepared for torque if the auger catches a root, rock, or hardpan.
Two essential safety reads:
If you want video guidance, start here: Getting started with digging augers.
Your clay-soil tooling checklist
Use the drill features that improve control
- Adjustable clutch: helps reduce runaway torque when the auger binds. and prevents injury. Most CORDED drill do NOT have a safety clutch. We only recommend cordless, battery operated drills.
- Side handle: improves control and comfort in tough soil.
- Low speed / high torque mode: you want torque and control, not high RPM.
Power Planter’s drilling guidance also recommends a side handle for tougher soil: Hole Digging 101.
Match drill power to your auger and soil
Clay and compacted soil often require higher drill power than loose soil. Before you attempt larger diameters in clay, read: Auger Drill Power: How Much Do I Need?.
If you’re upgrading drills, Power Planter publishes a drills collection with recommendations and stability features: DEWALT drills for augers.
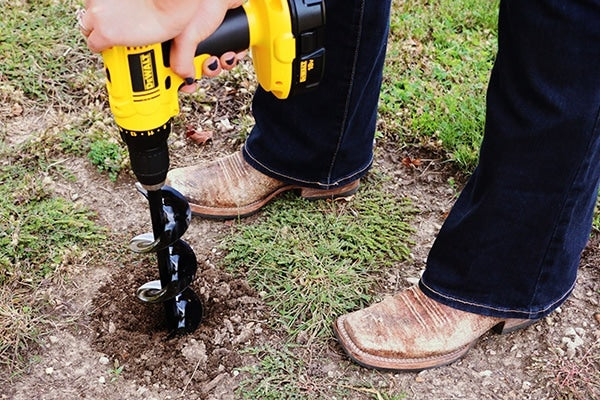
Step-by-step: how to drill holes in clay soil without binding
Step 1: mark the area and make a safe plan
Mark your spacing, confirm the digging area is safe, and avoid drilling near known utility routes. If you’re drilling multiple holes, plan a consistent workflow to avoid fatigue and rushed technique.
Step 2: pre-wet only if the soil is bone dry
If the clay is extremely dry and hard, lightly pre-wet the area and allow moisture time to soak in below the surface. Avoid drilling while it is muddy or saturated. We prefer wetting the night before so it has time to penetrate deep overnight.
Step 3: set your drill for control
- Select low speed / high torque mode.
- Start with a conservative clutch setting (don’t use “screw icon” mode ever when using an auger. There is no safety function with the clutch in this mode).
- Use the side handle if available. Follow ALL drill manufacturer safety guidelines and instructions for your specific drill brand and model.
Step 4: start the hole vertically and let the auger bite
Place the tip on the soil surface, keep the auger vertical, and start slowly. Don’t slam the trigger. Let the cutting edge start a clean entry point.
Step 5: use the clay technique: pulse + clear
Clay drilling works best when you avoid packing the flights:
- Drill for a few seconds.
- Lift out to clear clay from the flights.
- Repeat until you reach the desired depth.
Why it works: it keeps the cutting edges exposed and prevents the auger from becoming a “clay plug.”
Step 6: if the auger binds, stop immediately
If you feel binding or a sudden stall:
- Release the trigger.
- Reverse briefly to free the auger.
- Remove the auger and clear clay buildup.
- Lower the clutch setting and continue with shorter bursts.
Step 7: finish the hole without glazing the walls
Clay can “polish” (glaze) hole walls when overworked. If you’re planting, lightly roughen the sides of the hole before placing a plant, especially if the hole feels slick.
Troubleshooting: what’s going wrong and how to fix it
Quick answer: Clay soil is extremely dense, so most gardeners get the best results with a heavy-duty auger and a high-torque drill. The guide below explains which auger works best for each clay soil condition.
| Problem | Likely cause | Fix |
|---|---|---|
| Auger won’t go deeper / stalls immediately | Soil too dry/hard or drill underpowered for size | Pre-wet and wait; reduce diameter; verify drill power requirements |
| Clay packs into flights and stops cutting | Sticky clay + drilling too long without clearing | Pulse + clear; lift out often; consider a slightly larger bit if clogging persists |
| Drill twists your wrist (kickback) | Binding on rock/root/hardpan; clutch too high | Stop immediately; lower clutch; use side handle; drill in shorter bursts |
| Bit slips or comes loose | Chuck not properly tightened/locked | Re-seat and lock the bit; follow “how to secure a bit” guide |
| Heavy-duty auger no longer cuts well | Wear parts are dull or damaged | Replace wear parts (tip/blades) instead of replacing the entire auger |
When you should upgrade (and what to upgrade)
This is not a buyer’s guide. But when clay is beating up your setup, upgrades can be the difference between frustration and fast progress:
- If clay is your normal soil: start in the clay/compacted collection: Clay & compacted soil augers.
- If you’re doing bigger holes or extreme conditions: consider heavy-duty options with replaceable wear parts: Extreme soil & heavy-duty augers.
- If your drill is underpowered: confirm drill power and consider upgrading your drill setup: Drill power guide and Drills for augers.
Example of a heavy-duty setup: 9" x 28" extra large earth auger.
Maintenance: keep clay from destroying your equipment
Clay is harsh on cutting edges. Basic maintenance helps your auger keep cutting instead of smearing:
- Clean clay off your auger after each use.
- Store dry to prevent unnecessary wear and corrosion.
- If you use heavy-duty augers, replace wear parts instead of replacing the whole tool.
Maintenance guide: Garden Auger Maintenance and Repair Tips.
Replacement wear parts: Heavy-duty replacement tip | Replacement blades
FAQ
Should I drill in clay soil when it’s wet?
If the clay is very wet and holds its shape easily, consider waiting for slightly drier conditions to reduce compaction risk and sticky clogging.
How do I stop my auger from clogging in clay soil?
Use the pulse-and-clear technique: drill for a few seconds, then lift out and clear clay from the flights. Repeat until you reach depth.
What drill settings should I use for clay soil?
Use low speed/high torque, start with a conservative clutch setting, and increase only as needed. Avoid settings that disable the clutch unless you have full control of your setup.
How much drill power do I need for clay soil?
Drill power needs increase with auger diameter, hole depth, and soil toughness. Check the drill power guide for your auger size and soil conditions.
Do I need a heavy-duty auger for clay soil?
If clay is your normal soil or you’re drilling larger holes, a clay/compacted or heavy-duty auger setup can improve performance and durability.
What should I do if I’m still not sure what auger setup is right?
Use the project matcher or contact the team for a recommendation based on your project and soil conditions.
Next steps: Project matcher | Guarantee & return policy | Contact us