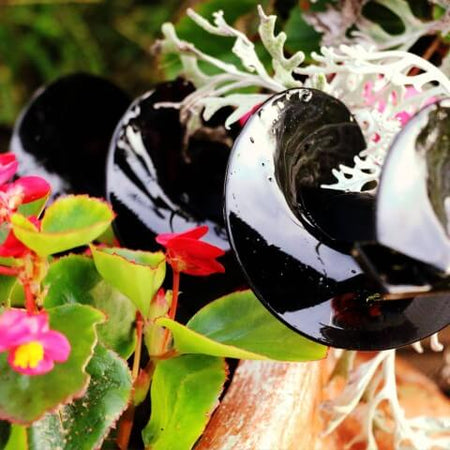
Chrysanthemums, also known as mums, are the final burst of color in many gardens before winter blankets us with cold and snow. These vibrant flowers light up the fall landscape, providing bursts of yellows, oranges, reds, whites, and more that make the days a little brighter even as the sun starts to go down earlier. In this guide, we'll walk you through planting mums early on using Power Planter augers, ensuring your garden transitions into winter with a spectacular display of these seasonal beauties.
Choosing the Right Power Planter Auger for Planting Chrysanthemums
When it comes to planting mums from pots, many of the augers sold by Power Planter are more than capable of getting the job done efficiently. While it might seem necessary to choose an auger that is as big or bigger than the pot size of the mum, it’s actually not crucial. A smaller diameter auger can still effectively create a hole by reaming it out to make the hole big enough for the root ball. Here are some of our favorite augers for planting mums:
3" x Standing Lengths: These augers are ideal for those who prefer to work standing up without bending over too much. They’re perfect for digging deeper into the soil, ensuring that larger mums have enough space to establish their roots. These would require you to ream holes for most potted mums.
5” x 28”: Ideal for large, more precise holes, this auger is perfect for the standard sizes of mum pots. It drills holes quickly and cleanly, ensuring that each mum plant has the ideal placement in your garden.
7" x 28": This auger is great for creating wider holes, suitable for the larger pots mums often come in. It’s strong and efficient, making it easy to prepare your garden for multiple plantings in quick succession, plus it’s a great all-around auger for other jobs.
Materials Needed for Planting Mums
To guarantee a vibrant display of chrysanthemums this fall, having the right tools and materials is essential. Not only do they make the planting process easier and more enjoyable, but they also help ensure your flowers grow healthy and strong. Here’s everything you’ll need to start planting mums
Chrysanthemum Plants: Choose healthy plants from your local nursery. Look for mums in a variety of colors to create a diverse and vibrant display. Mums are sold in a variety of container sizes ranging from 4-inch to 16-inch pots as well as hanging baskets.
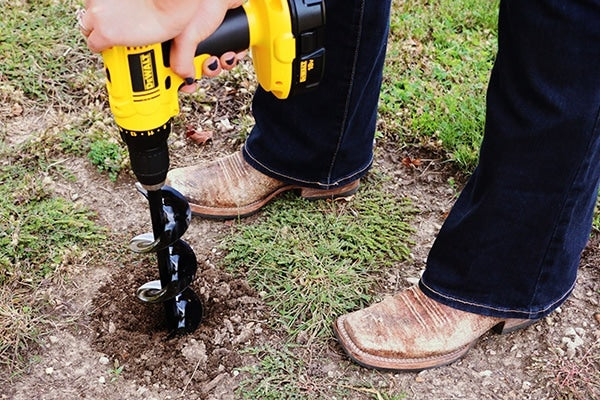
Power Planter Auger and a Drill: Grab your auger and fix it to your drill. These will be doing the heavy lifting in the planting process.
Organic Compost or Fertilizer: Opt for a high-quality organic compost or a fertilizer specifically formulated for flowering plants, such as GroTab Fertilizer Tablets. This will enrich the soil and provide the necessary nutrients for your mums to flourish.
Watering Can or Hose: Proper watering is essential for mums, especially right after planting and during dry spells. Use a watering can with a sprinkle nozzle or a hose with a gentle spray setting to keep the soil evenly moist without overwatering.
How to Plant Chrysanthemums: Selecting the Perfect Spot
Planting mums correctly is key to ensuring they thrive and bring vibrant colors to your autumn garden. Here’s a step-by-step guide to planting mums effectively:
Do Chrysanthemums Need Full Sun?
Yes, mums thrive in locations that offer full sun for at least 6 hours a day. This is crucial for their growth and bloom density, making a sunny spot ideal for these fall favorites.
Drill the Holes
Attach the appropriate Power Planter auger to your drill, based on the size of the mum containers you are using. For example, use a wider auger for larger containers to accommodate the size of the root balls.
Use the auger to drill holes that are evenly spaced and deep enough so that the entire root ball can be comfortably placed within. Ensure that each hole is spaced about 18-24 inches apart to give each mum ample space to grow.
Prepare the Mums
Before planting, gently remove the mum plants from their containers. Carefully loosen up the root bunch at the bottom of each plant. This step is crucial as it helps the roots spread out more easily in the new soil, which is essential for establishing a healthy plant.
Plant the Mums
Place each mum plant into a hole, ensuring that the top of the root ball is level with the surrounding soil. This placement encourages the plant to grow upwards and outwards evenly.
Fill in around each plant with soil. As you backfill, use the auger to lightly mix and aerate the soil around each plant. This not only helps integrate the existing garden soil with any new soil or compost but also ensures that the soil isn’t too compact, allowing roots to expand freely.
Water Thoroughly
Once all the plants are in place and the soil is backfilled, water each plant thoroughly. This initial watering is vital as it helps to settle the soil around the roots and eliminates any air pockets. Ensure the water penetrates deep into the soil to encourage deep root growth.
Final Checks
After planting and watering, give the soil around each plant a gentle press with your hands to make sure the plant is secure and there are no loose areas that could cause air pockets or uneven settling.
By following these steps, you’ll help your mums set strong roots, promoting healthy growth and ensuring they add to the vibrant fall landscape. Proper initial planting is key to a long-lasting and healthy display of chrysanthemums.
Are Chrysanthemums Perennials?
While some chrysanthemum varieties are perennials, most mums purchased for fall displays are treated as annuals, planted primarily for seasonal color. These mums are selected for their vibrant blooms that last through the autumn months, but they typically do not survive the winter once temperatures drop significantly. In these climates it may be best to skip planting the mums in the ground and just enjoy their beauty while it lasts in their pots.
Most garden mums will continue to provide color from late summer until the first hard frost, which can be several weeks depending on your local climate. In areas with mild winters, some carefully selected perennial mums might survive if given proper care and protection from the coldest temperatures. However, for the most part, the mums you see brightening up fall landscapes are enjoyed for their seasonal display and are not expected to return the following year.
Aftercare for Mums
To ensure your mums thrive throughout the autumn season, follow these simple aftercare tips:
Watering
Mums require consistent soil moisture to stay healthy. When checking the soil, it should feel moist but not waterlogged. During dry spells, water your mums deeply to encourage strong root growth. This is especially crucial in the weeks after planting and during periods of low rainfall. A good rule of thumb is to water when the top inch of soil feels dry to the touch.
Mulching
Applying a layer of mulch around your mums helps to retain soil moisture and regulate soil temperature. As temperatures begin to drop in late autumn, mulch serves an additional purpose by insulating the root area. This can be particularly beneficial for mums that are being grown as perennials, as it helps protect the roots from freezing temperatures.
Expectations for Growth
With the right care, your mums will not only settle into their new home quickly but will also reward you with vigorous growth and abundant blooms:
Establishment and Growth
Your mums should begin to establish themselves within a few weeks of planting. You'll notice new growth as they adapt to their location and start to spread their roots.
Blooming Period
Expect your mums to produce a profusion of dense blooms from late summer through the fall. Regular deadheading of spent flowers can encourage more blooms to form, extending the display until the first hard frost. Mums are renowned for their ability to offer long-lasting color in the garden, making them a favorite for fall decoration.
Using Power Planter augers for planting mums not only eases your gardening tasks but also sets the stage for a spectacular autumn display. As the cooler days of fall approach, your garden will continue to dazzle with the rich colors of chrysanthemums.


