

Installing a mailbox can seem daunting, especially when it comes to digging the post hole. But with the right tools, like a post hole digging auger, the process becomes more straightforward and much easier on your back! In this post, we’ll cover everything you need to know about how to install mailbox posts with an auger, including answers to common questions like what size auger to use and how deep to dig for optimum mailbox post hole depth.
Step-by-Step Guide to Installing a Mailbox Post with an Auger
Step 1: Gather Your Tools
For this project, you will need:
- a high-quality post hole auger (7”x28” or 9”x28” augers are perfect)
- a power drill (we recommend 60-volt DeWalt drills for a 7” to 9” diameter auger.)
- a mailbox post
- quick-setting concrete mix or expanding foam
- a level
- a measuring tape
- safety gear (gloves and eye protection)
- gravel (optional, for drainage)
- post hole tamper (optional)
Step 2: Plan Your Mailbox Location and Check Local Regulations
The USPS guidelines suggest that the mailbox should be 6-8 inches back from the curb, and the bottom of the mailbox should be 41 to 45 inches above ground level. Always check your local regulations or homeowner association guidelines before installing. To check where underground utilities lurk in your yard, call 811 before you dig.
Step 3: Mark Your Spot and Determine Mailbox Post Hole Depth
Being mindful of utilities, mark the exact spot where you want to dig your mailbox hole using the measuring tape to determine the ideal mailbox post hole depth. Typically, you’ll want to dig mailbox post holes at least 18 to 24 inches deep to ensure the post is secure, especially in areas with colder climates where frost can affect post stability.
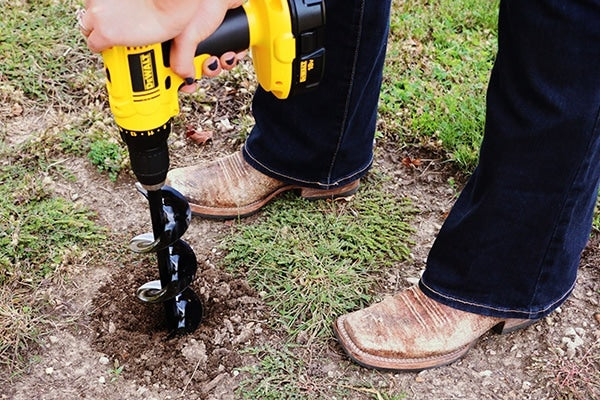
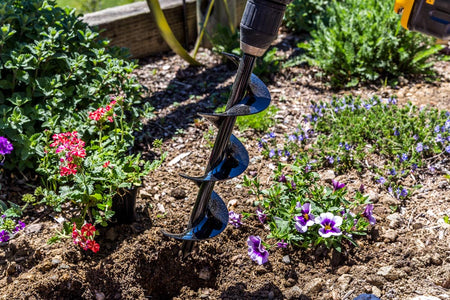
Step 4: Drill the Mailbox Post Hole with Your Auger
Attach the auger to your power drill and begin drilling at your marked spot. Keep the auger steady, straight up and down, and let the tool do the work. For most installations, a hole that is 24 inches deep and 6 to 9 inches in diameter is ideal. If you encounter any clay or other hard soil, the auger will help break through, making the process much easier than traditional digging.
Step 5: Check the Mailbox Post Hole Depth and Add Gravel for Drainage
After drilling, measure the depth of your mailbox post hole to ensure it meets the required depth. If needed, you can drill a bit deeper. If drainage is a concern, add 2-4 inches of gravel to the bottom of the hole to prevent water accumulation, which can rot wooden posts over time.
Step 6: Insert the Mailbox Post and Check for Level
Place your mailbox post into the newly-augered post hole, making sure it stands upright and level. Use a level to check both sides of the post, adjusting as needed. This step is crucial for a straight and professional-looking mailbox installation.
Step 7: Set the Post with Concrete or Foam
Fill the hole around the post with quick-set concrete or expanding foam. After it is halfway full, pause to check and ensure the post remains level. Add more concrete or foam until it reaches ground level, then slope the top of the filling material away from the post to direct water away from the post base.
Step 8: Attach the Mailbox and Add Finishing Touches
After the concrete has cured or the foam has set, attach your mailbox to the post according to the manufacturer’s instructions. Once the mailbox is on the post, you can add numbers or other decorative elements as desired.
Frequently Asked Questions
Why Use an Auger for Your Mailbox Hole?
Using an auger for digging your mailbox post hole offers many advantages over traditional shovels and manual mailbox post-hole diggers:
- Efficiency: An auger can dig the perfect mailbox post hole in just minutes, saving you a significant amount of time and effort.
- Precision: Augers create clean, consistent holes with the right diameter and depth, ensuring your mailbox post is installed securely.
- Ease of Use: Augers are easy to handle and require less physical effort, making them a great choice for DIYers and professionals alike.
What Size Auger for Mailbox Post?
Choosing the correct auger size is crucial for a successful mailbox post installation. The auger size determines the diameter of the hole, which should be slightly wider than your post to allow for setting materials like concrete or foam.
- 7-Inch Auger: Ideal for standard 4x4 mailbox posts. This size creates a snug fit, minimizing the amount of backfill needed while still allowing room for concrete or other securing materials. We suggest PowerPlanter’s 7" x 28" Gallon Pot & Post Hole Auger.
- 9-Inch Auger: Best for larger or decorative posts that need more stability. The wider hole provides extra space for securing materials, ensuring that the post remains sturdy. We suggest PowerPlanter’s 9" x 28" Extra Large Earth Auger with Heavy-Duty Tip.
How Deep Should a Mailbox Post Hole Be Dug?
The depth of your auger’s mailbox post hole is a critical factor in ensuring that your mailbox stands straight and stable for years to come.
- Standard Depth: Generally, a mailbox post hole should be 18 to 24 inches deep. This depth is sufficient to provide stability while keeping the post firmly anchored in the ground.
- Frost Line Considerations: In colder climates, it’s essential to dig below the frost line, which can vary based on your location. Digging below the frost line (usually around 30 to 36 inches in northern states) helps prevent frost heave, which can push the post out of the ground during freeze-thaw cycles.
- Stability Tip: After drilling your hole, add 2-4 inches of gravel at the bottom to improve drainage and prevent wood rot if using a wooden post. This also helps to create a solid base for your post.
Final Thoughts on Mailbox Post Installation
Installing a mailbox with an auger is a quick and efficient way to get a professional result without the hassle of manual digging. By choosing the right auger size, drilling to the correct depth, and carefully selecting your securing method—whether it’s concrete or foam—you’ll ensure your mailbox stands strong and looks great for years to come.